Blog Series:
- Azure AD Application Proxy with a Claims Aware Web App – Part 1
- Azure AD Application Proxy with a Claims Aware Web App – Part 2
- Azure AD Application Proxy with a Claims Aware Web App – Part 3
- Azure AD Application Proxy with a Claims Aware Web App – Part 4
- Azure AD Application Proxy with a Claims Aware Web App – Part 5
- Azure AD Application Proxy with a Claims Aware Web App – Part 6
Lab Design Overview
Use Case:
PublishSharePoint Server application as internet facing.
Users authenticate with Azure Active Directory while using their AD account credentials.
Main technology:
Azure AD Application Proxy helps you support remote workers by publishing on-premises applications to be accessed over the internet. You can publish these applications through the Azure portal to provide secure remote access from outside your network.
Design choices for the purposes of this lab environment
- Emulating an on-premises environment with an Azure IaaS environment.
- Deployed SharePoint 2013 Non-HA Farm. Note this configuration can work on SharePoint 2016.
- Azure AD Connect to sync AD accounts to Azure AD.
- Azure AD Connect supports self-service password reset.
- Windows Authentication with Kerberos Constrained Delegation for single-sign-on
- Azure AD Application proxy and Azure AD Connect is installed in the SP server for small server footprint; otherwise, installed on a dedicated VM is more ideal.
System Architecture:

Install Azure AD Application Proxy and Azure AD Connect:
Prerequisite: SharePoint 2013 Non-HA Farm on Azure IaaS
To build my SharePoint farm, I used the following Azure template: https://azuremarketplace.microsoft.com/en-us/marketplace/apps/sharepoint2013.sharepoint2013farm?tab=Overview
Install Azure AD Application Proxy Connector
Login into a server to install the Azure AD Application Proxy connector. In my lab, for simplicity, I chose to install onto the SP server. Ideally, this should be installed on its own server.
Download and install: https://download.msappproxy.net/subscription/d3c8b69d-6bf7-42be-a529-3fe9c2e70c90/connector/download


Azure AD Directory and Enabling the Azure AD Application Proxy.
I create a new Azure AD Directory exclusively for this lab. At this time, you can only create a new AD directory in the older portal.
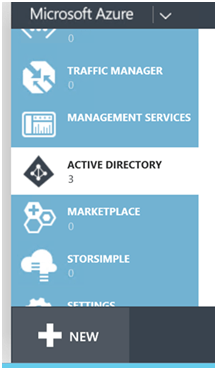
Go to classic portal manage.windowsazure.com
Login as admin to your Azure subscription
Select Active Directory
Click New

To be able to use the Azure AD Application proxy for this AD directory, we need AD Premium or basic license.
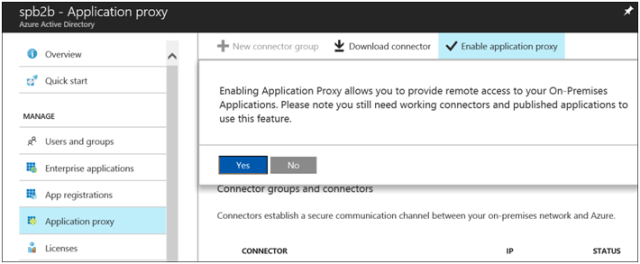
Select the Application Proxy blade > Click on purple notification to go to license options.

Click Free trial

Click Enable application proxy and then Yes
For details on enabling the application proxy, refer to https://docs.microsoft.com/en-us/azure/active-directory/active-directory-application-proxy-enable
Azure AD Directory> Licenses > All Products
To view the Application proxy connection configuration from the Azure Portal, go to the Azure AD > Application Proxy and view the connector and its status.

Confirm Connect status as Active

Pingback: Azure AD Azure Application Proxy with SharePoint Server 2013/2016 Blog Part 2 – Roy Kim on SharePoint, Azure, BI, Office 365
Pingback: Azure AD Azure Application Proxy with SharePoint Server 2013/2016 Blog Part 3 – Roy Kim on SharePoint, Azure, BI, Office 365
Pingback: Azure AD Azure Application Proxy with SharePoint Server 2013/2016 Blog Part 4 – Roy Kim on SharePoint, Azure, BI, Office 365
Pingback: Azure AD Azure Application Proxy with SharePoint Server 2013/2016 Blog Part 5 – Roy Kim on SharePoint, Azure, BI, Office 365
Pingback: Azure AD Azure Application Proxy with SharePoint Server 2013/2016 Blog Part 6 – Roy Kim on SharePoint, Azure, BI, Office 365
This blog series provides helpful information about setting up an application proxy.