In the recent months, the hype around Machine Learning has caught my attention. Therefore, I spent reading articles and watching videos and university lectures on the topic. Wearing the developer hat, I wondered how a developer can build a machine learning solution in Azure. This blog post hopes to share how I built a machine learning experiment using Azure Machine Learning Studio. By no means am I a data scientist. And forgot everything from my statistics courses in university. I come to understand that a machine learning solution is much less about the tools, but more so about statistical modelling and cleaning the data. I hope to show the general steps to build an experiment that will assist other beginners in understanding Azure Machine Learning.
In Azure Portal, go to Machine Learning workspaces. I had one already created.
Click on Launch Machine Learning Studio
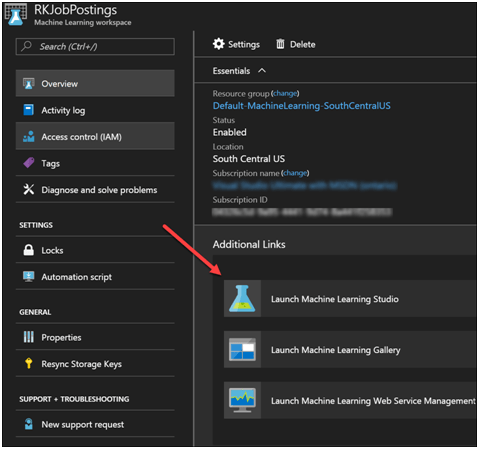
This will take you essentially to https://studio.azureml.net
Upload a data set. I will upload a .tsv file I produced with Azure Data Lake Analytics.
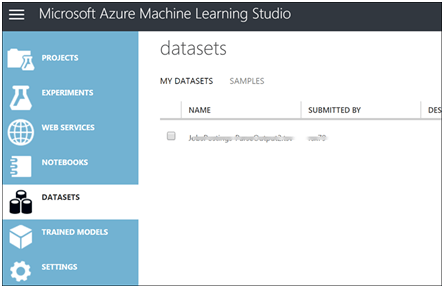
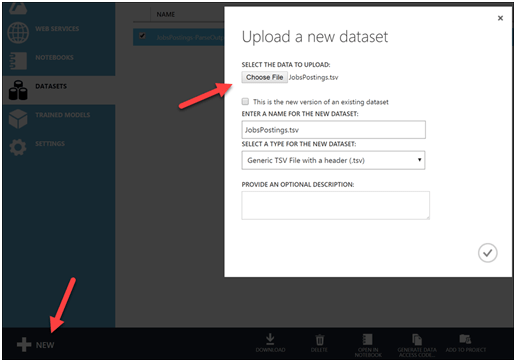
In the left navigation DATASETS, click NEW, select data file from local computer to upload. Note my file has a column header row for ease of data manipulation.
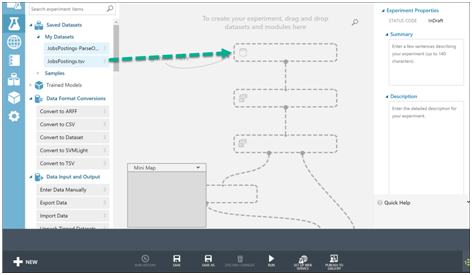
Create new Experiment>Blank Experiment

We see the design surface. Drag the data set.
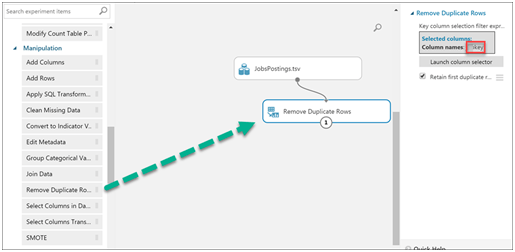
We can do further do data cleanup and manipulation with the operations on the left pane. For example, I will remove any duplicates based on a selected key field.
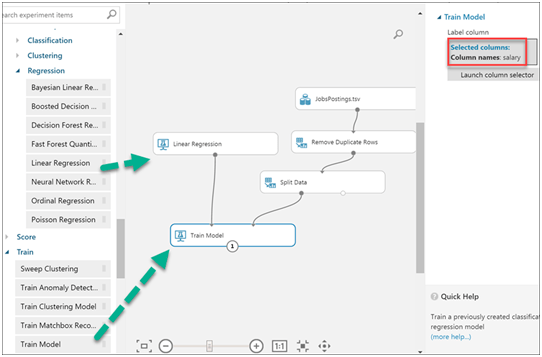
Split the rows of a dataset into two distinct sets. One for training the model and one for scoring the model.

To predict salary, I use the Linear Regression module. Regression is a machine learning used to predict a numeric outcome. Linear regression attempts to establish a linear relationship between independent variables and an outcome variable, or dependent variable, that is also numeric. Read more here
Use the Train Model module. Training a classification or regression model is a kind of supervised machine learning. That means you must provide a dataset that contains historical data from which to learn patterns. The data should contain both the outcome you are trying to predict, and related factors (variables). The machine learning model uses the data to extract statistical patterns and build a model. Read more here
One of the split data sets is used to train model.
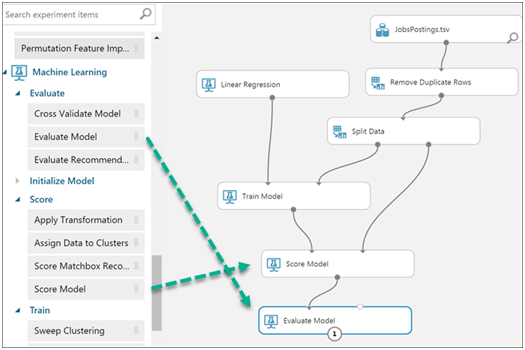
Once the model has been trained, we can use the 2nd split data set to make predictions by using the Score Model module. Read more about it here
Use the Evaluate Model module to see how accurate the predictions were from the 2nd split data set.
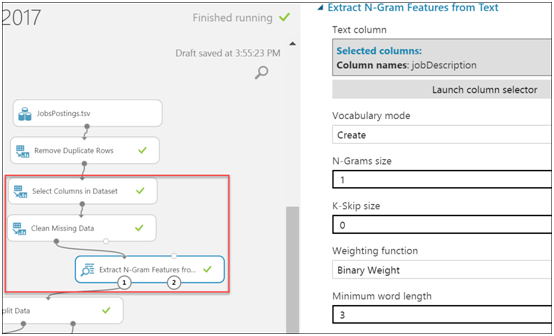
To resolve, I will select a subset of columns (city, salary, and jobdescription) and use the Clean Missing Databy removing rows where there is missing salary. In addition, to improve on the accuracy, I add Extract N-Gram Features from Text where jobdescription selected text column. This module is to featurize the long text string and infer valuable information that may help provide a correlation between the job posting and its salary. I must say that this may not be the right approach, but want to demonstrate the use of such modules in an experiment. For further details on this module read Extract N-Gram Features from Text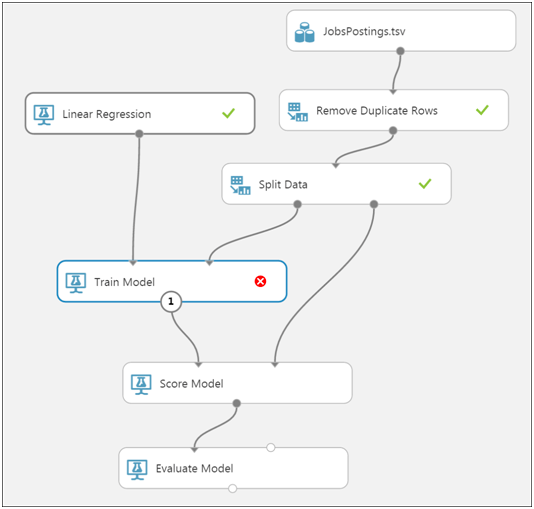
To resolve, I will select a subset of columns (city, salary and jobdescription) and use the Clean Missing Data by removing rows where there is missing salary. In addition, to improve on the accuracy, I add Extract N-Gram Features from Text where jobdescription selected text column. This module is to featurize the long text string and infer valuable information that may help provide a correlation between the job posting and its salary. I must say that this may not be the right approach, but want to demonstrate the use of such modules in an experiment. For further details on this module read Extract N-Gram Features from Text
Click Run.

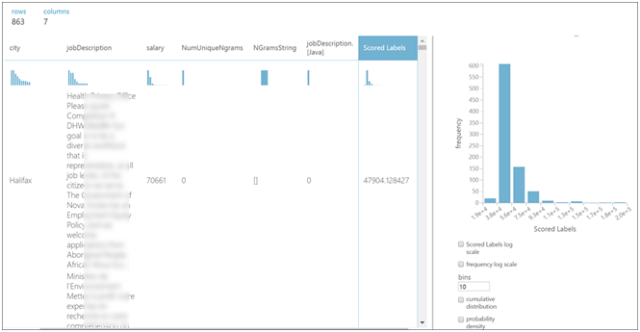
To see a sampling of scored dataset, go to Visualize

We can see the predicted salary value in the scored label column. In this one row, as an example, the actual salary is 70,661. Based on the city, job description through the N-gram extraction, the predicted salary is 47,904. Quite a bit off. Let’s evaluate the model as a whole.
Right click into Evaluate Model > Evaluation results > Visualize
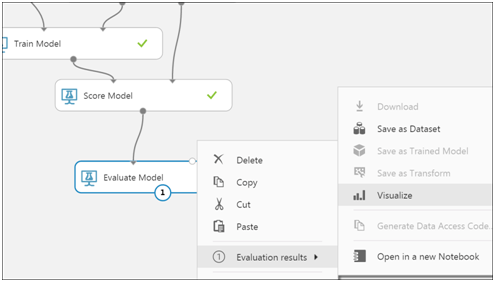
The metrics provide details on the amount of error. For example, mean absolute error shows the level of accuracy of predictions against the actual outcomes. Likely using the 2nd split data set. For more details on the metrics read Evaluate Model

This is where statistical knowledge and expertise comes into place in tweaking the parameters of your machine learning module and model and then re-run the experiment. Continue to iterate until you have a desired trained model with low amount of error.
You then create a web service that takes the parameters to make the salary prediction, based on some parameters.
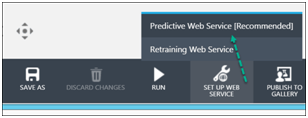
As a result, the experiment becomes

For further details and steps on the predictive web service, read How a Machine Learning model progresses from an experiment to an operationalized Web service
This concludes my very basic demo of an Azure ML experiment.
My take-aways from my introductory learning experience of Azure Machine Learning and background reading is that
- machine learning is simply just modelling with statistics and mathematics.
- prediction can be an outcome with or without an associated probability.
- a developer needs a robust understanding of statistics much more so than the software engineering. In other words, a .NET developer can’t just pick it up and learn the technical tooling and provide a solution. Partnering up with a statistician/data scientist would be more productive.
- machine learning algorithms is like an application being written for you based on a model, input and predicted outcome. This contrasts with formulating a model and figuring out the business rules and logic, parameters and writing the application.
Hope to learn more about machine learning and build on my understanding as technology platforms continue to add some ML service offerings.
