
Kubernetes AI Tool Chain Operator (KAITO) streamlines the deployment of a large language model such as Falcon, Llama or Phi-3. KAITO will deploy the the LLM into a new AKS node pool with a preset GPU. Without KAITO, an engineer would need to build all the necessary components. They would also have to automate access permissions and services, etc.
Official Documentation: https://github.com/Azure/kaito
KAITO is helpful in scenarios where a data engineer or scientist experiments with various AI/ML models. These experiments occur in an AKS environment with a specified GPU configuration. Also, KAITO is useful in situations where data exchanged with the model is kept locally. This is important for security, regulatory, and compliance reasons.
Step-by-step Setup Summary
- Create AKS Cluster
- Install Workspace Controller
- Enable Workload Identity and OIDC Issuer features
- Create an managed identity and assign permissions
- Install Node-Provisioner Controller via Helm Chart
- Create the federated credential for the managed identity
- Install a Large Language Model as an Inference Service
- Test Inference Service with a curlimage pod
Final Result: Prompt Response against LLM inference service on AKS:

Here are my detailed visual steps.
1. Create AKS Cluster

This is just your standard vanilla AKS cluster.
2. Install Workspace Controller
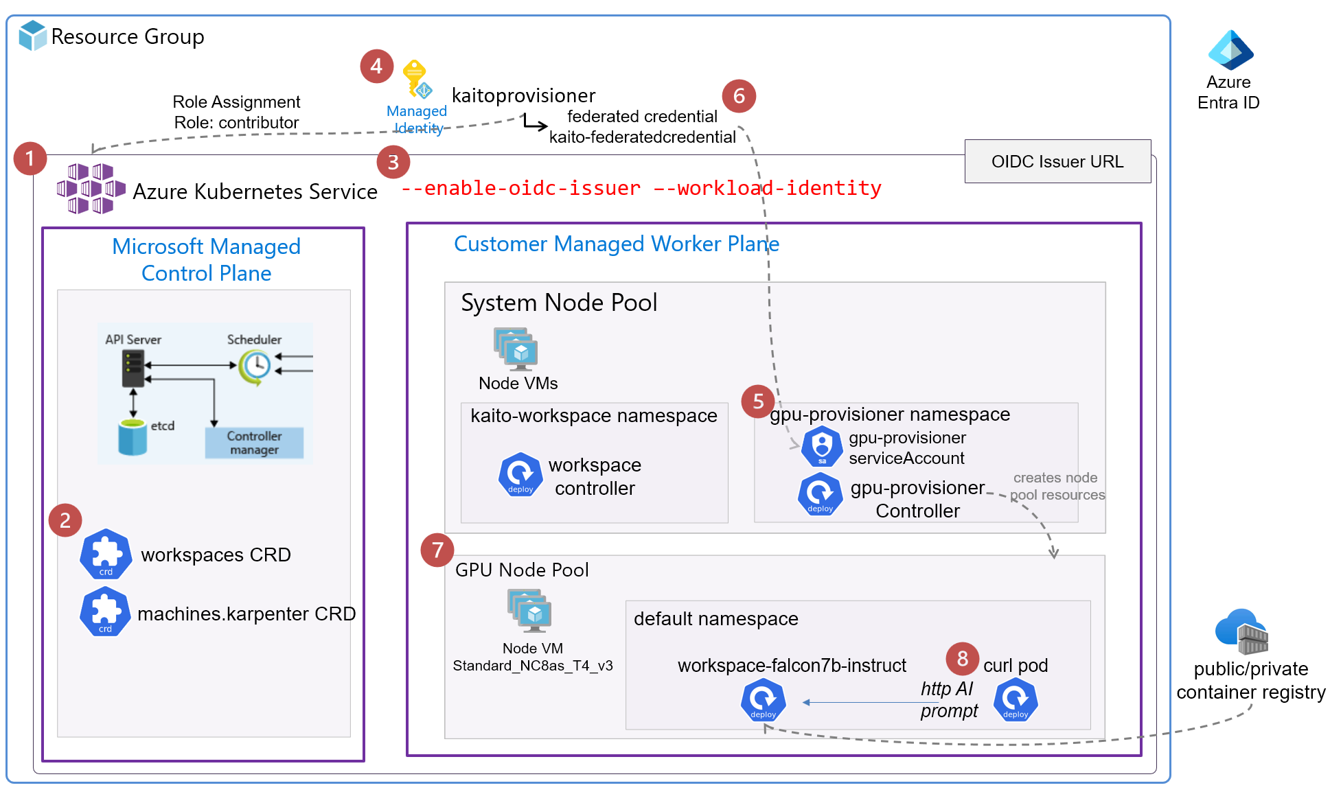
The workspace controller is responsible for taking a workspace manifest yaml that is configured to deploy a large language model(LLM) with some preset configuration as a K8s deployment, statefulset or job. And based on also creates calls on the Node provisioner controller to create a K8s node pool with the preset Virtual Machine SKU with the GPU.

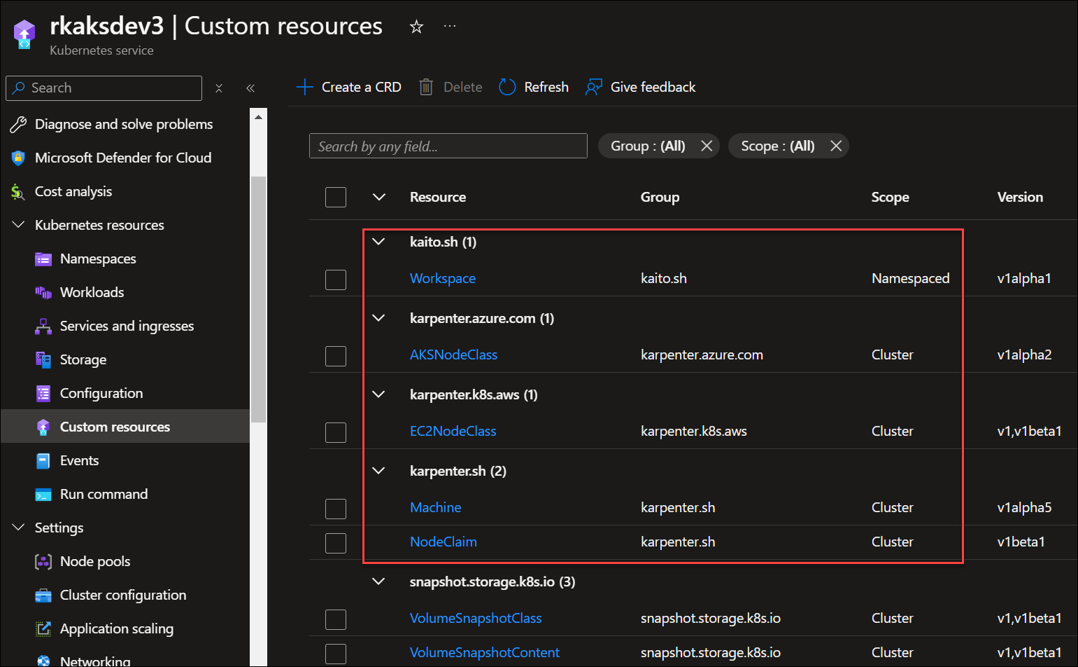
Note that the above step created the K8s Customer Resource Definitions (CRD) to support the workspace and node provisioner controllers.
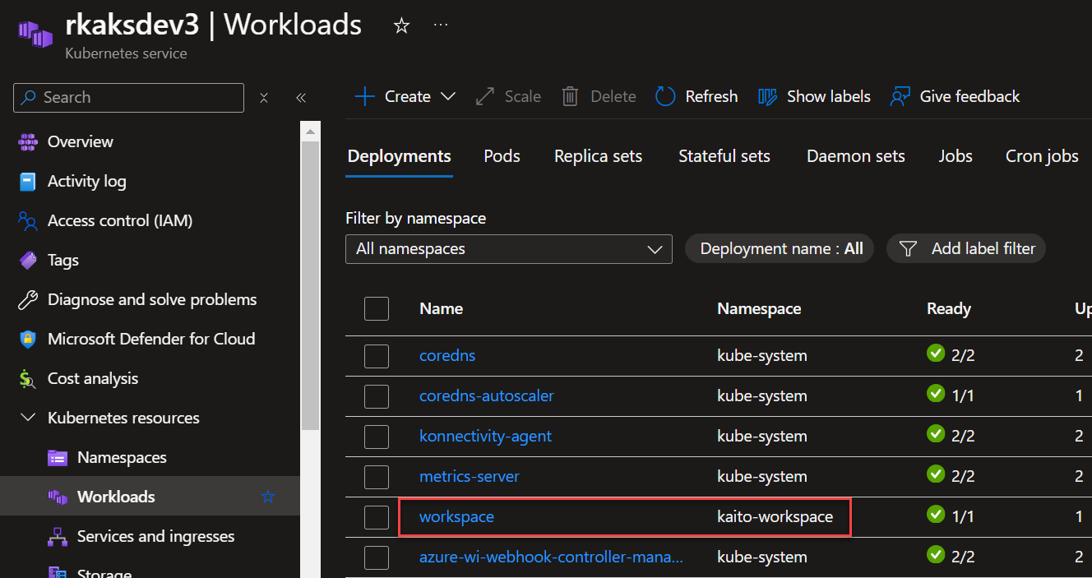
A workspace (controller) deployment resource is created in the kaito-workspace namespace.
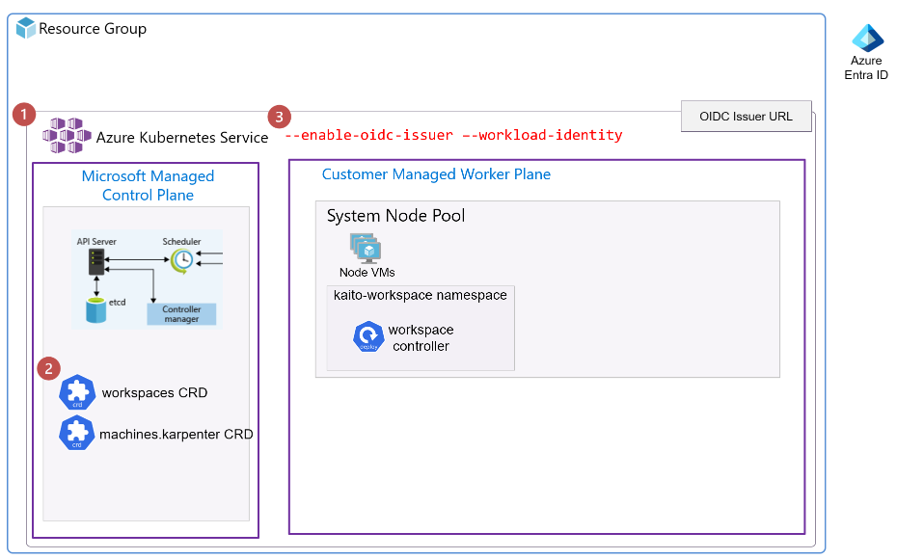
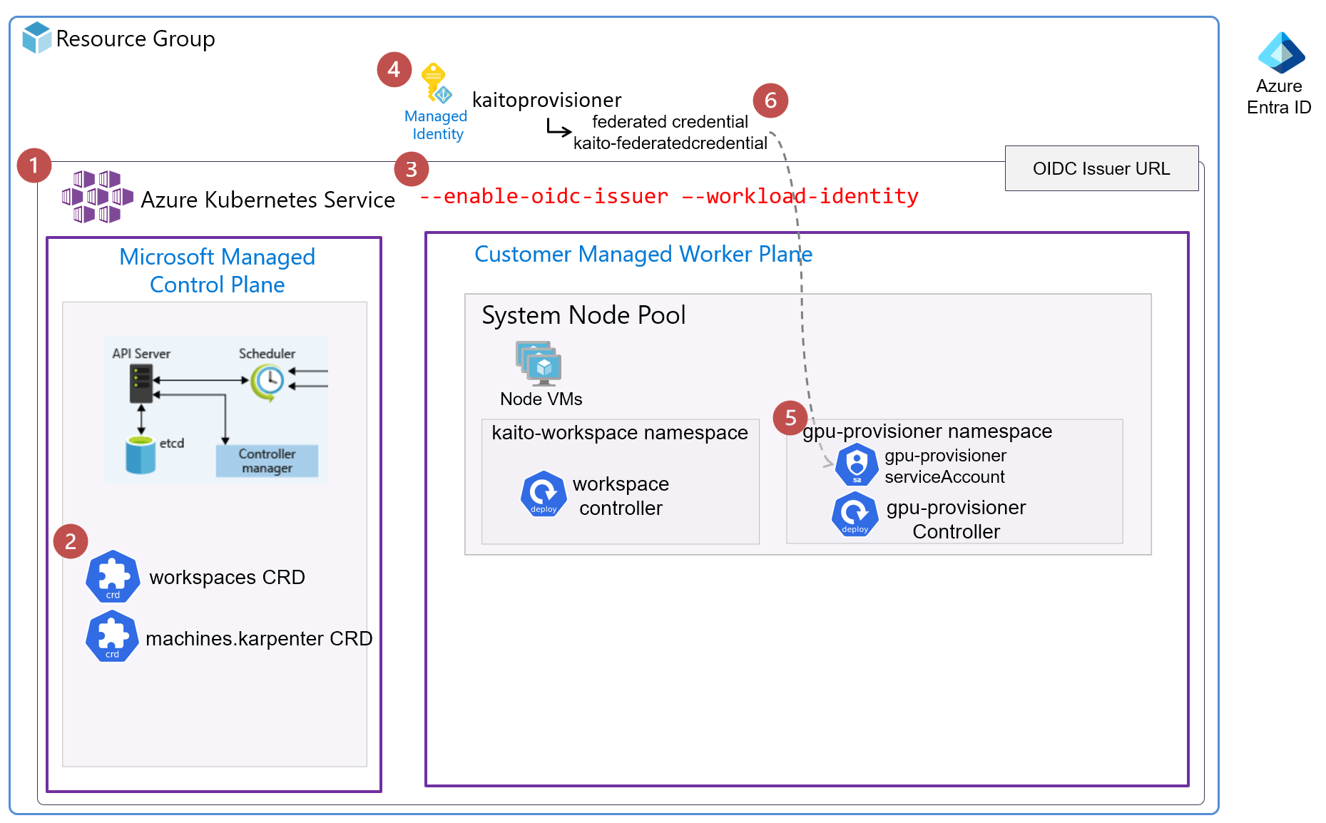
3. Enable Workload Identity and OIDC Issuer features
The KAITO design relies on the AKS features of workload identity and OIDC Issuer. These two features allows the Kubernetes workloads such as the Node Provisioner Controller to have the role based access via federated Azure Entra Identity Management to create Azure resources. In this case the AKS node pool Virtual machines. Workload Identity removes the need for secrets (like passwords or tokens) within Kubernetes by leveraging the native authentication of Azure Entra.

The Open ID Issuer URL is the endpoint that AKS provides for issuing OpenID Connect (OIDC) tokens. These tokens allow Kubernetes workloads (such as the node provisioner controller pods) to authenticate with Azure Entra. The OIDC issuer URL enables Workload Identity Federation between AKS and Azure Entra.

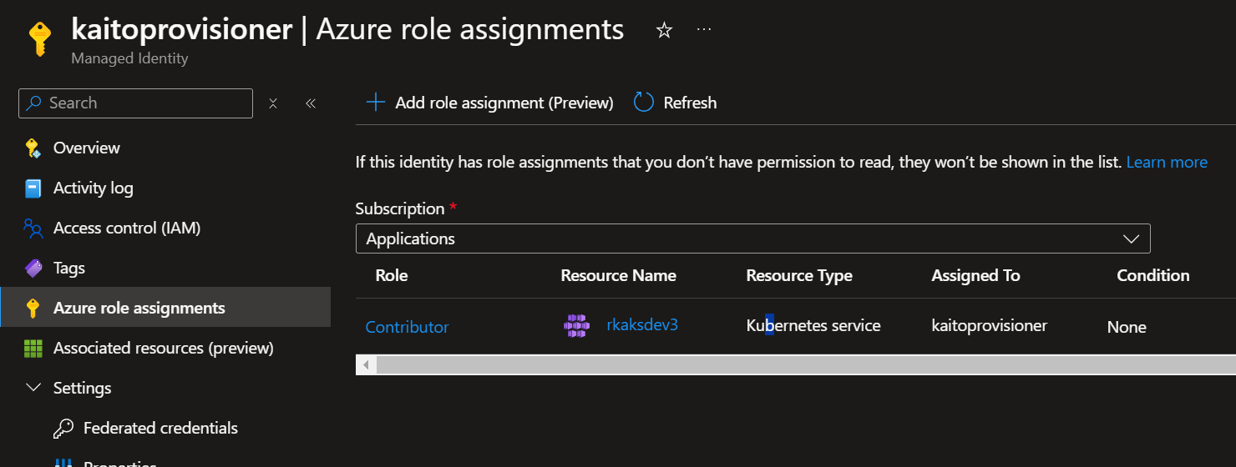
4. Create an managed identity and assign permissions
Create the managed identity for the Kaito node provisioner and grant it the Contributor RBAC role to the AKS resource.

Verify the role assignment of Contributor role to the AKS resource.
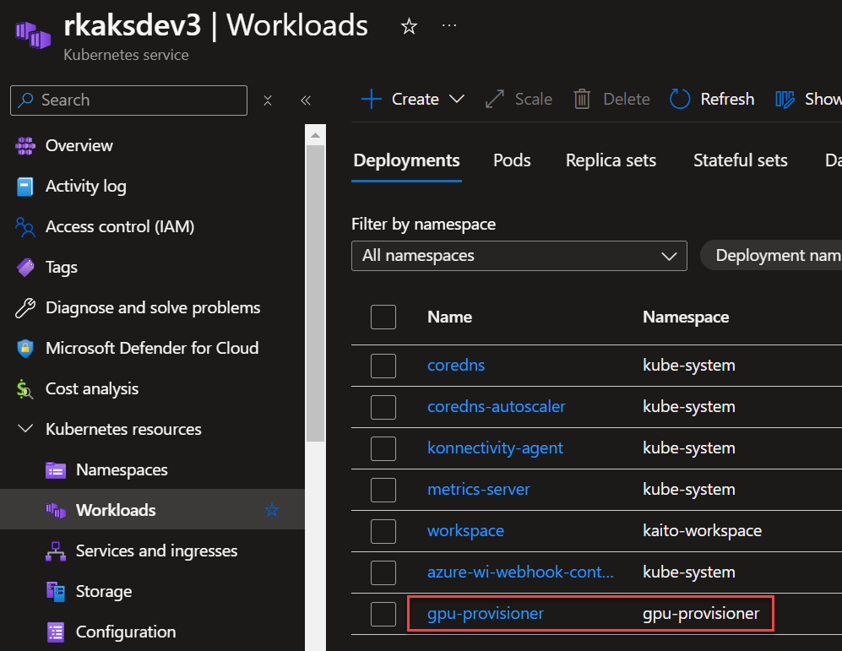
5. Install Node-Provisioner Controller via Helm Chart
The Node Provisioner controller uses the machine CRD from Karpenter. With the adequate Azure Entra permissions, it creates the GPU nodes in a new AKS node pool. For Karpenter details, read https://github.com/kubernetes-sigs/karpenter.

You can see the gpu-provisioner controller deployment in the new gpu-provisioner namespace.
6. Create the federated credential for the managed identity
Use the az identity federated-credential create, it creates a federated credential for the previously created managed identity, the federated credential is associated with an Azure Managed Identity (either a system-assigned or user-assigned managed identity). To locate this federated credential resource in the Azure portal, follow these steps:

The az identity federated-credential cmd makes reference of the subject to the gpu-provisioner service account created in the previous step.

To verify in the kaitoprovisioner managed identity, go to Federated credentials settings.
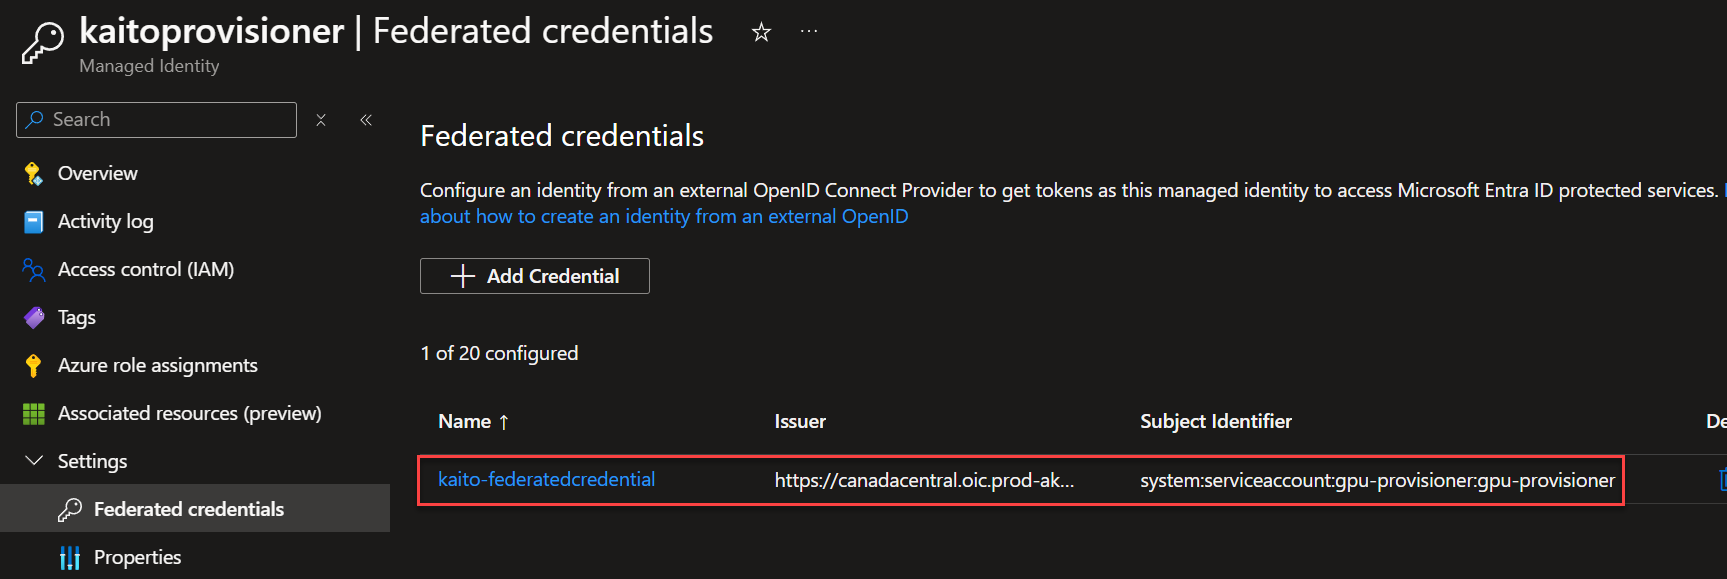
Now when the gpu-provisioner controller is triggered by the workspace controller, the gpu-provisioner service account can be authenticated. It can be authorized via Azure Entra to create the GPU node VM node resources.
7. Install a Large Language Model as an Inference Service
Now, that the KAITO is all setup, we can begin to deploy an LLM such as the Falcon 7b into this cluster.
This custom resource Workspace manifests defines the GPU Node VM which is Standard_NC12s_v3. And the LLM model is defined to be falcon-7b.
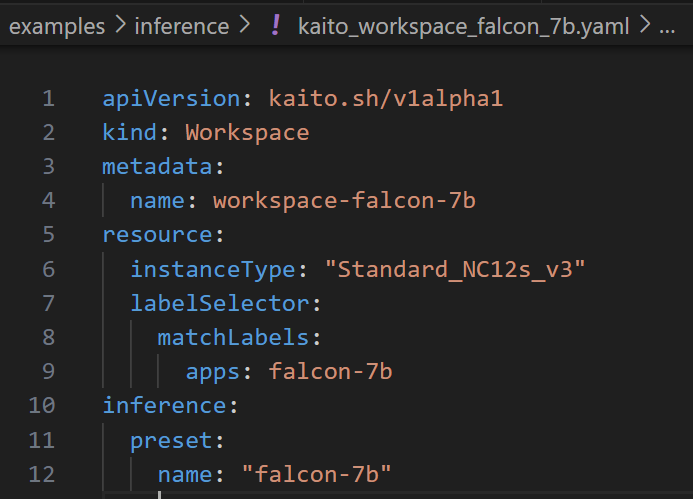
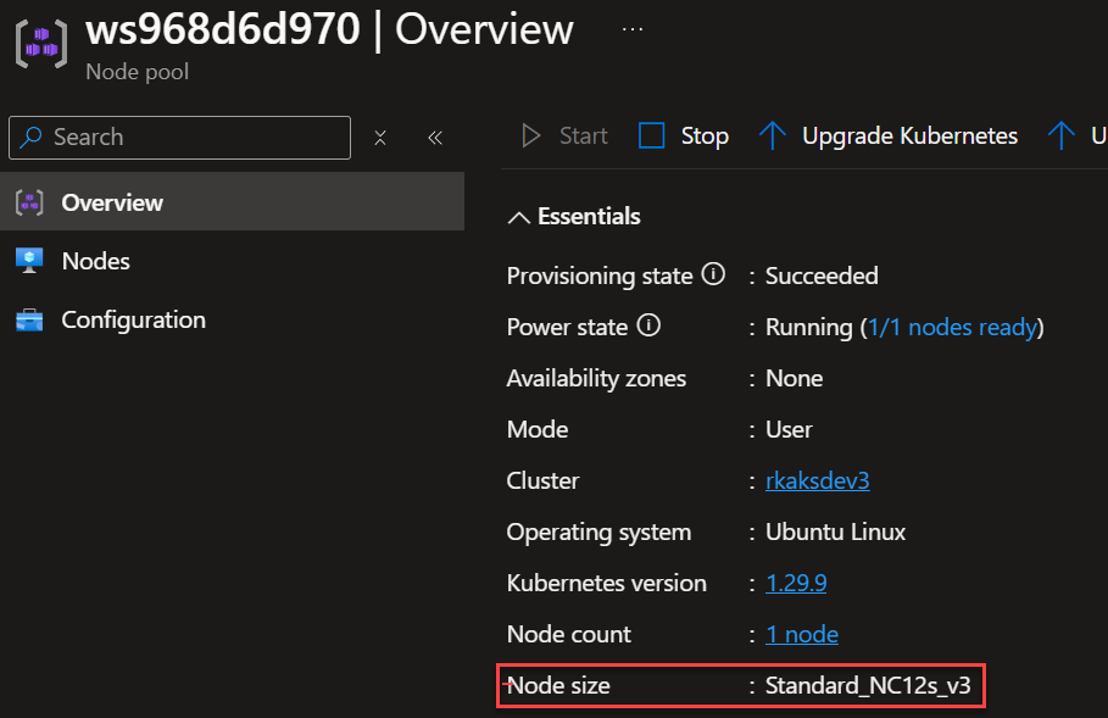
The specs (shown in Azure Portal) are defined. These are very costly and so you want to stop the node pool when unused.

For other Kaito preset configurations of other model families refer to https://github.com/Azure/kaito/blob/main/presets/README.md.

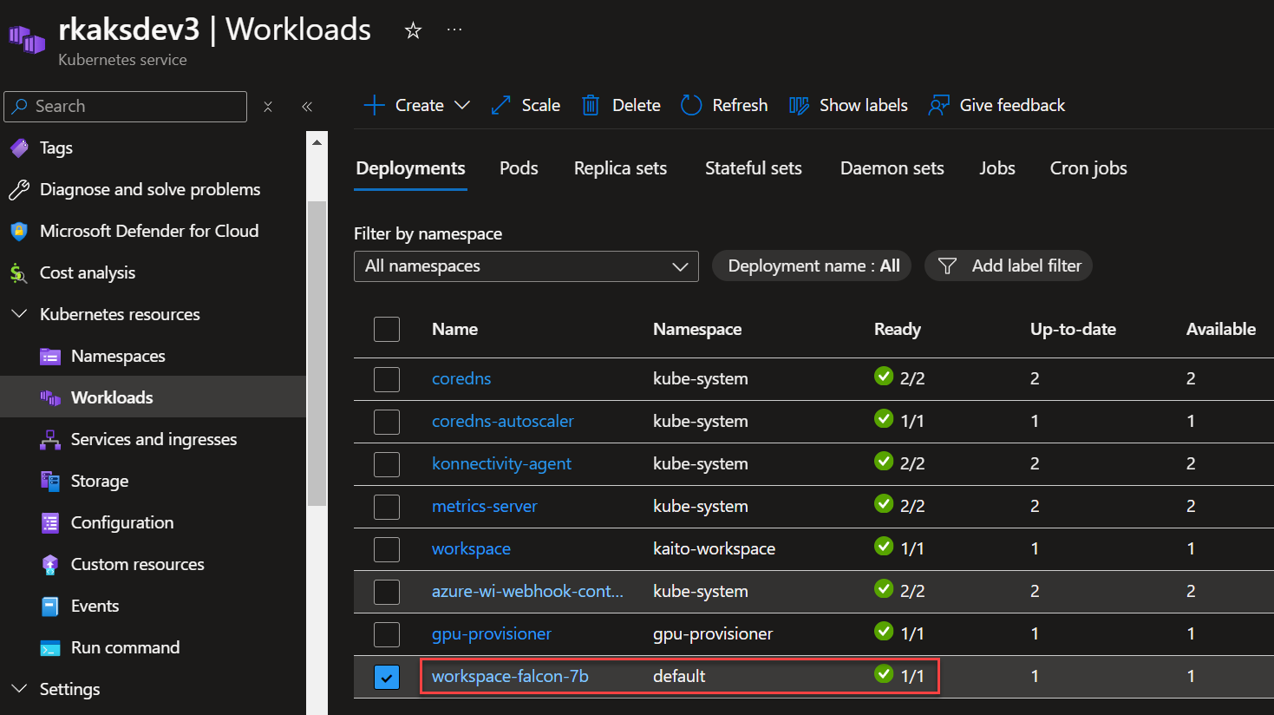
The workspace controller orchestrates the deployment of the LLM inference service depicted as workspace-falcon7b deployment workload and is hosted in its own GPU node pool.

The provisioning process can take about 10 minutes. And to check on progress you run
$ kubectl get workspace workspace-falcon-7bHere we see all three

To verify, we see the new GPU node pool created and in a running state.

Finally, we see the inference service running.
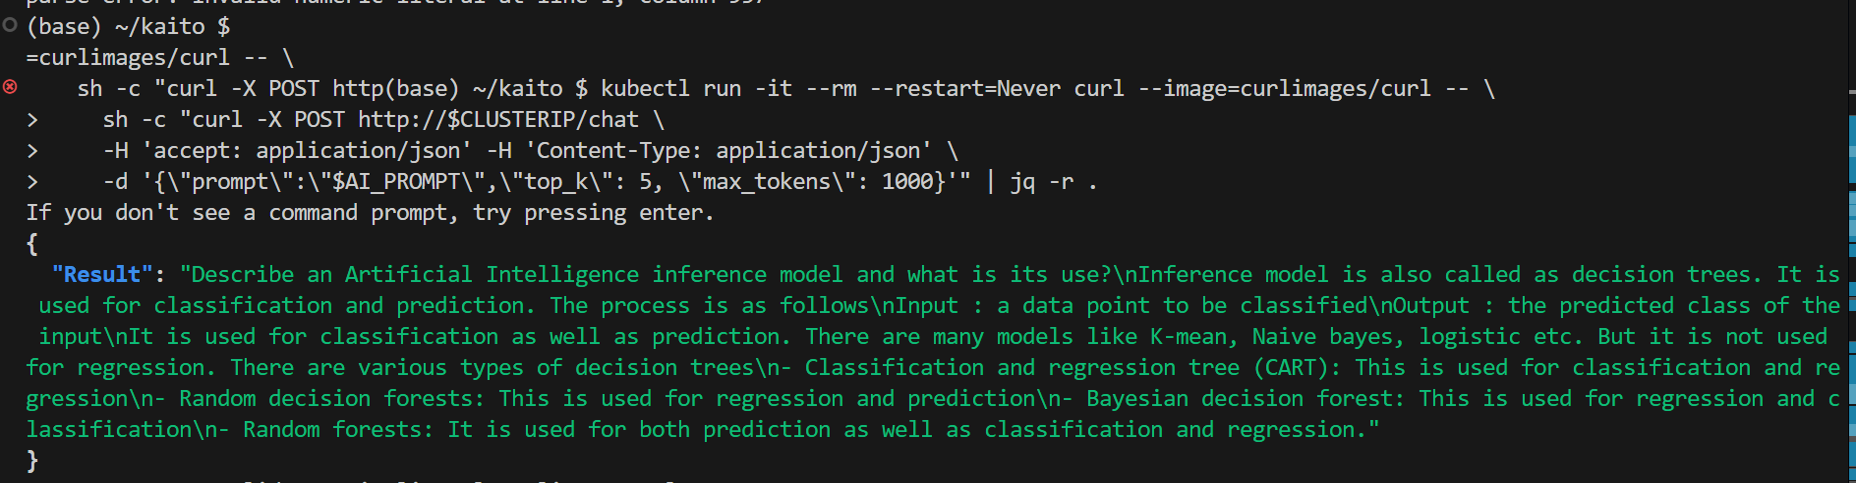
8. Test Inference Service with a curlimage pod
Prepare a prompt

To do a simple test, create a curlimage pod to make an http call against the the workspace-falcon-7b inference service cluster IP.

Here is the output of the http api call which includes the API response.
Animated demo:
From here you can integrate your application and chatbot apps against this inference service.

Pingback: GPU Virtual Machines For KAITO Models on AKS – Roy Kim on Azure and Microsoft 365
Pingback: Deep Dive Into Fine-Tuning An LM Using KAITO on AKS – Part 2: Execution – Roy Kim on Azure and Microsoft 365
Pingback: Deep Dive Into Fine-Tuning An LM Using KAITO on AKS – Part 3: Deploying the FT Model – Roy Kim on Azure and Microsoft 365
Pingback: Deep Dive Into Fine-Tuning An LM Using KAITO on AKS – Part 2: Execution – Roy Kim on Azure and AI