
In my Part 1 post, I introduced GitHub Actions and preparing a workflow with an Azure service principal name (spn) and storing the credentials as a repository secret so the workflow has permissions to into a resource group. In this blog post, I will walkthrough the workflow YAML code that is
- Manual user trigger with user input.
- A workflow job that runs on ubuntu
- Checkout the repository
- Login in the desired azure subscription with stored secret credentials
- Setup Python with desired version
- Install python packages and dependencies that is required by my python code.
- Build my Python code into a package as an command line tool
- Call the command line tool and pass in the argument values from the workflow input fields.
My python command creates a storage account and uploads a file stored in the rep into its blob container.
You can find the entire workflow yaml file at https://github.com/RoyKimYYZ/az-python/blob/main/.github/workflows/pythonbuildrun.yml
The first piece is defining the name of the workflow as ‘Build and Run’. It is triggered manually and I have defined user inputs as follows. The region input parameter I’m not using but leaving it for future. The filename assumes the main folder path.

Next I define one job that runs on the latest version of an ubuntu Linux runner. The job will run on a fresh compute host and define the series of steps to execute actions. The first step is executes the checkout action to get the repo files into the runner. The files are needed eventually to build the command line tool. Next step, I use the Azure login action and pass the spn credentials stored as a repository secret.

You can search for the Azure Login action in the Github Marketplace to see the documentation

Next step is the Setup Python action to set up a specific version of Python and add the command-line tools to the PATH. Need this for building and using pip python package manager.
Next is to run python packages and libraries that is needed for my Python script. This includes Azure SDK for Python libraries. I define them in the requirements.txt file that is in the repo folder.

Next I build the python code into an executable command line tool. The command line tool is create_azstorage_cli. This is defined in the setup.py file.

The next 3 steps are for debugging purposes and aren’t required. But it helps to show what the values of the workflow inputs are and see the files in the runner. The linux which command helps identify the location of the command line tool that was built on line 47.

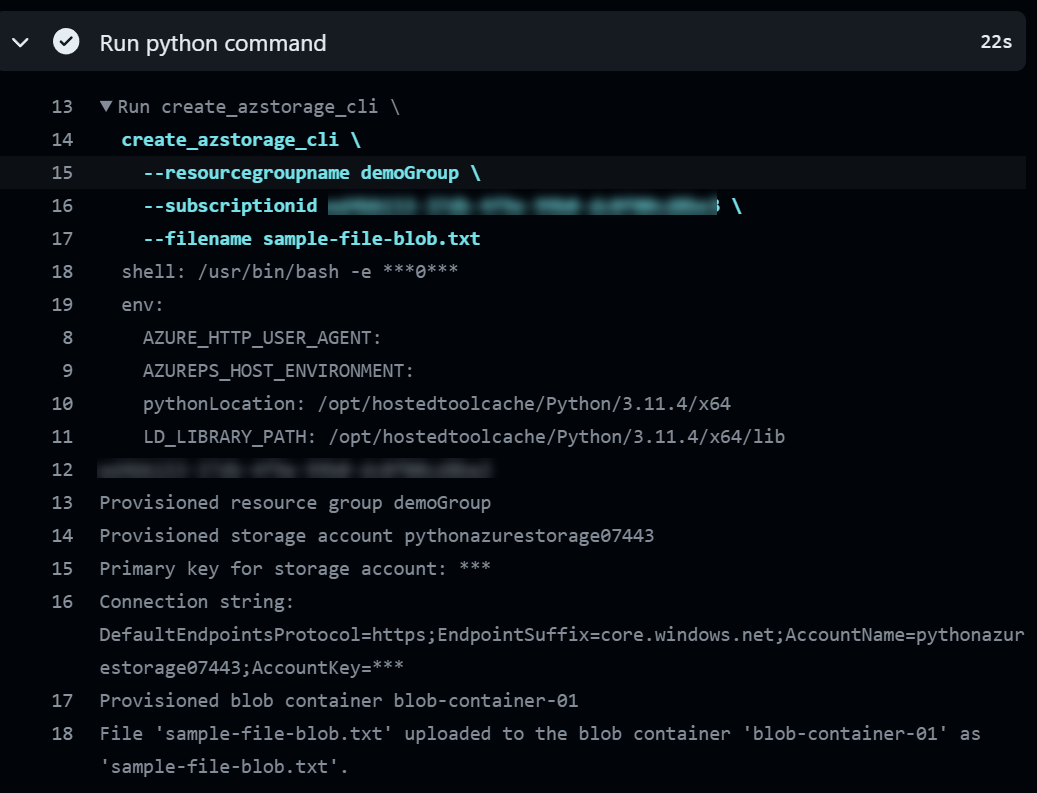
Finally, I run the create_azstorage_cli command and pass in the argument values as the workflow inputs defined earlier.

Let’s execute the GitHub Actions Workflow

Workflow running..

Clicking into it will show:

To show a few of the key steps, let’s see the azure login output

See the file path of the built command line tool.

Finally the output of the command line execution
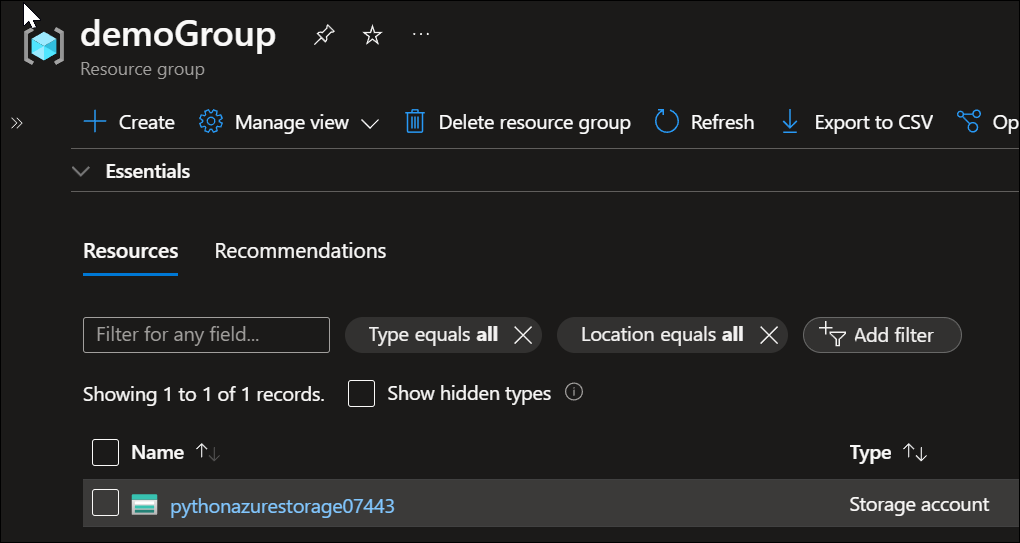
And the final result in the Azure Portal. Resource group with the newly created storage account
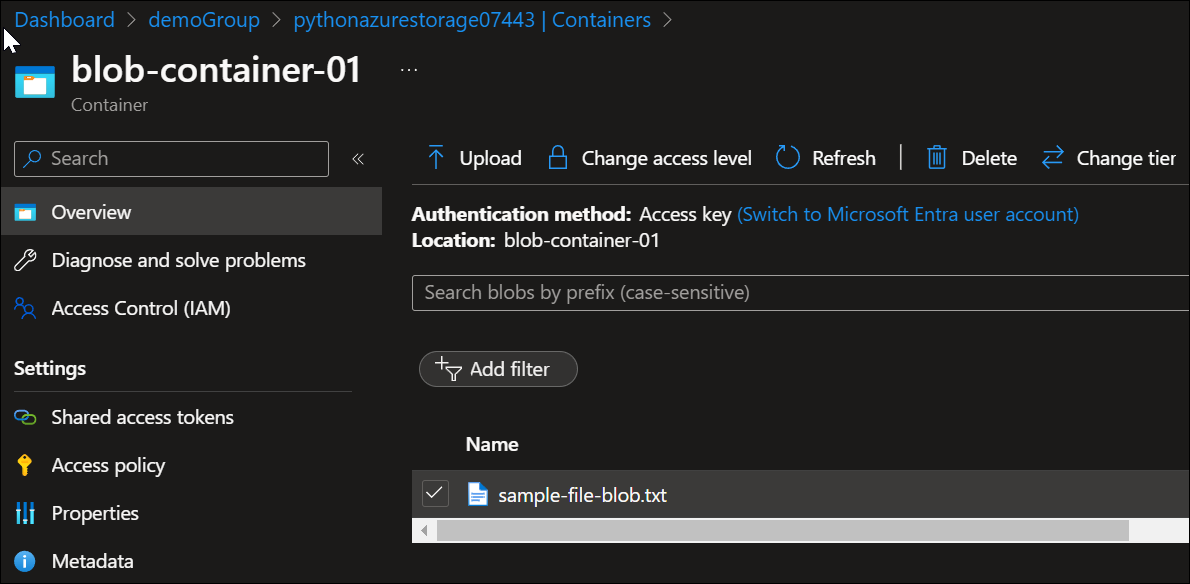
Within the storage account’s blob container, the text file stored in the rep is uploaded.
This demonstrates the use of GitHub Actions workflow to build and run your custom command line tool by leverage an Azure service principal name that the workflow can use for access.
References

Pingback: Using GitHub Actions To Run My Python Azure Command Line Tool – Part 1 – Roy Kim on Azure and Microsoft 365