Azure OpenAI provides generative AI capabilities for your apps and in a corporate enterprise setting. You have access pre-trained models like GPT-3.5 and GPT-4 that are used in Chat GPT from OpenAI.
You can develop Chat based applications or integrate into your existing apps.
Azure OpenAI through an web API. You can an http URL endpoint along with a secret key you have to include in each of your API calls.

Next, you want to create or use any existing model deployment. Click on Model deployment blade
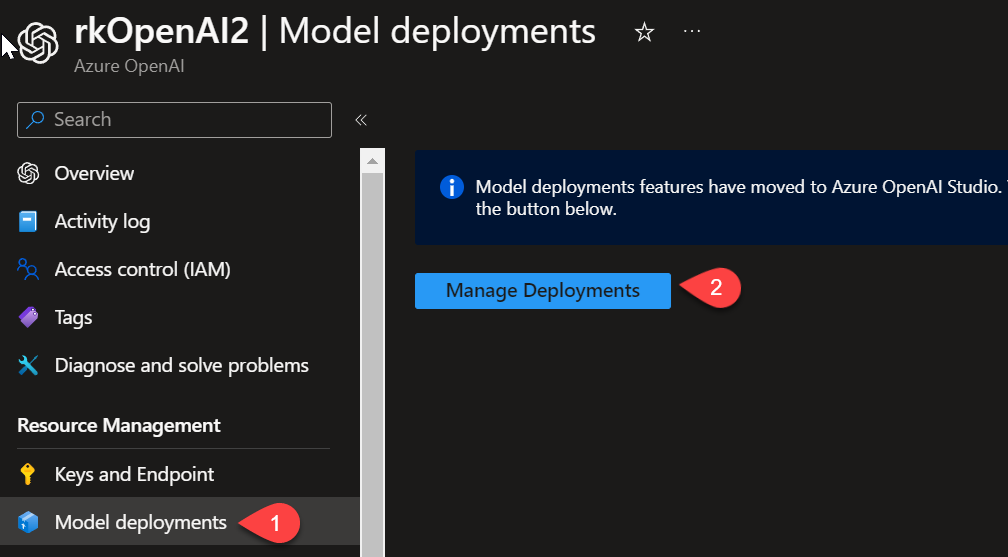
which will take you to the Azure OpenAI Studio. This is where you do most of the engineering and developing with Azure OpenAI.
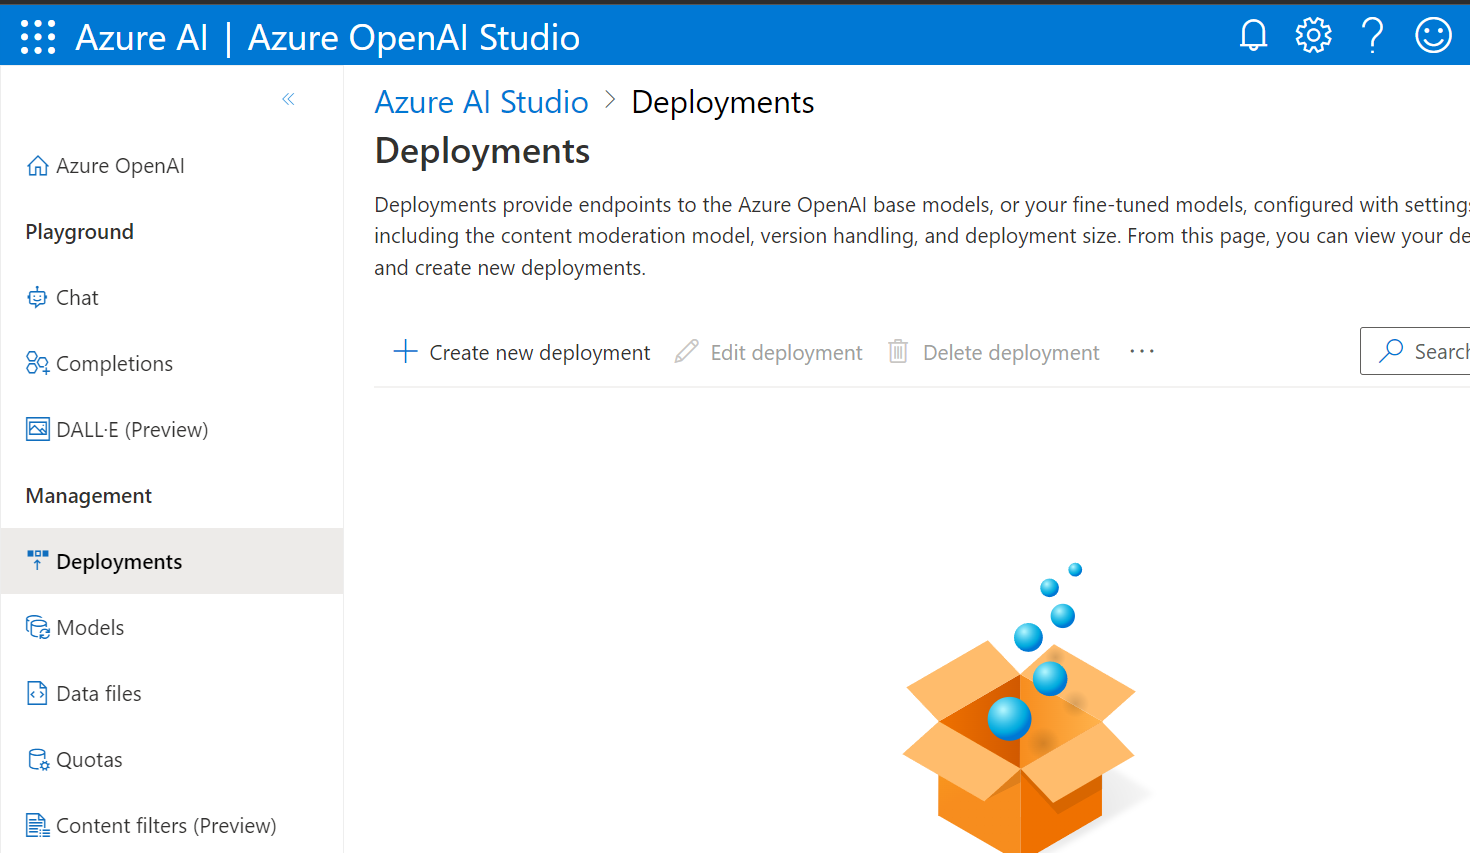
Create new deployment where we can choose from the available base models.
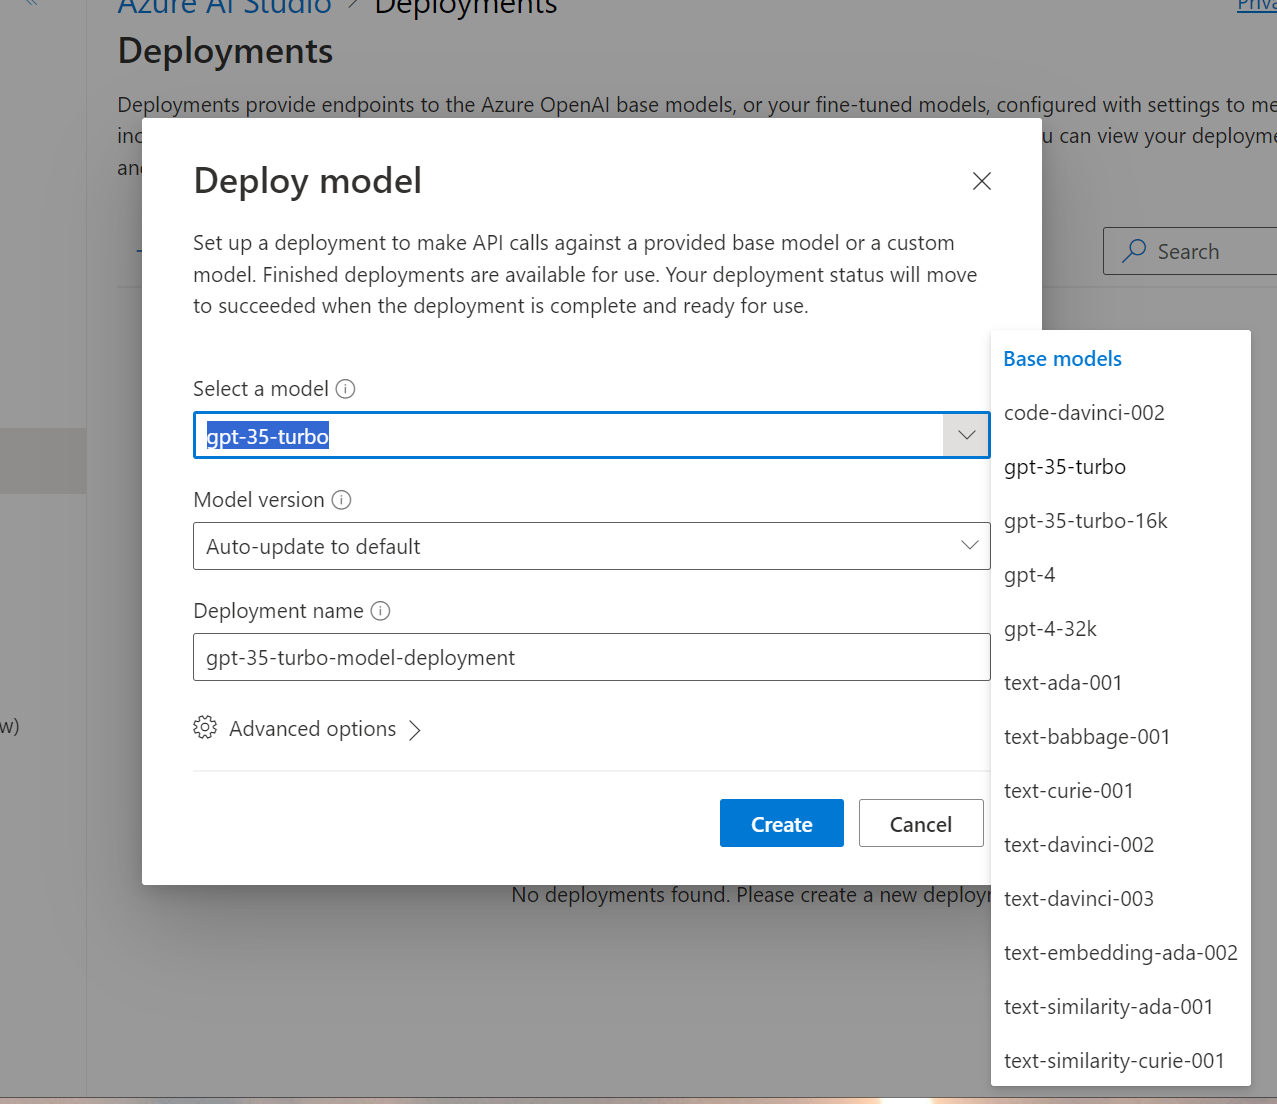
The full set of models you can find as such
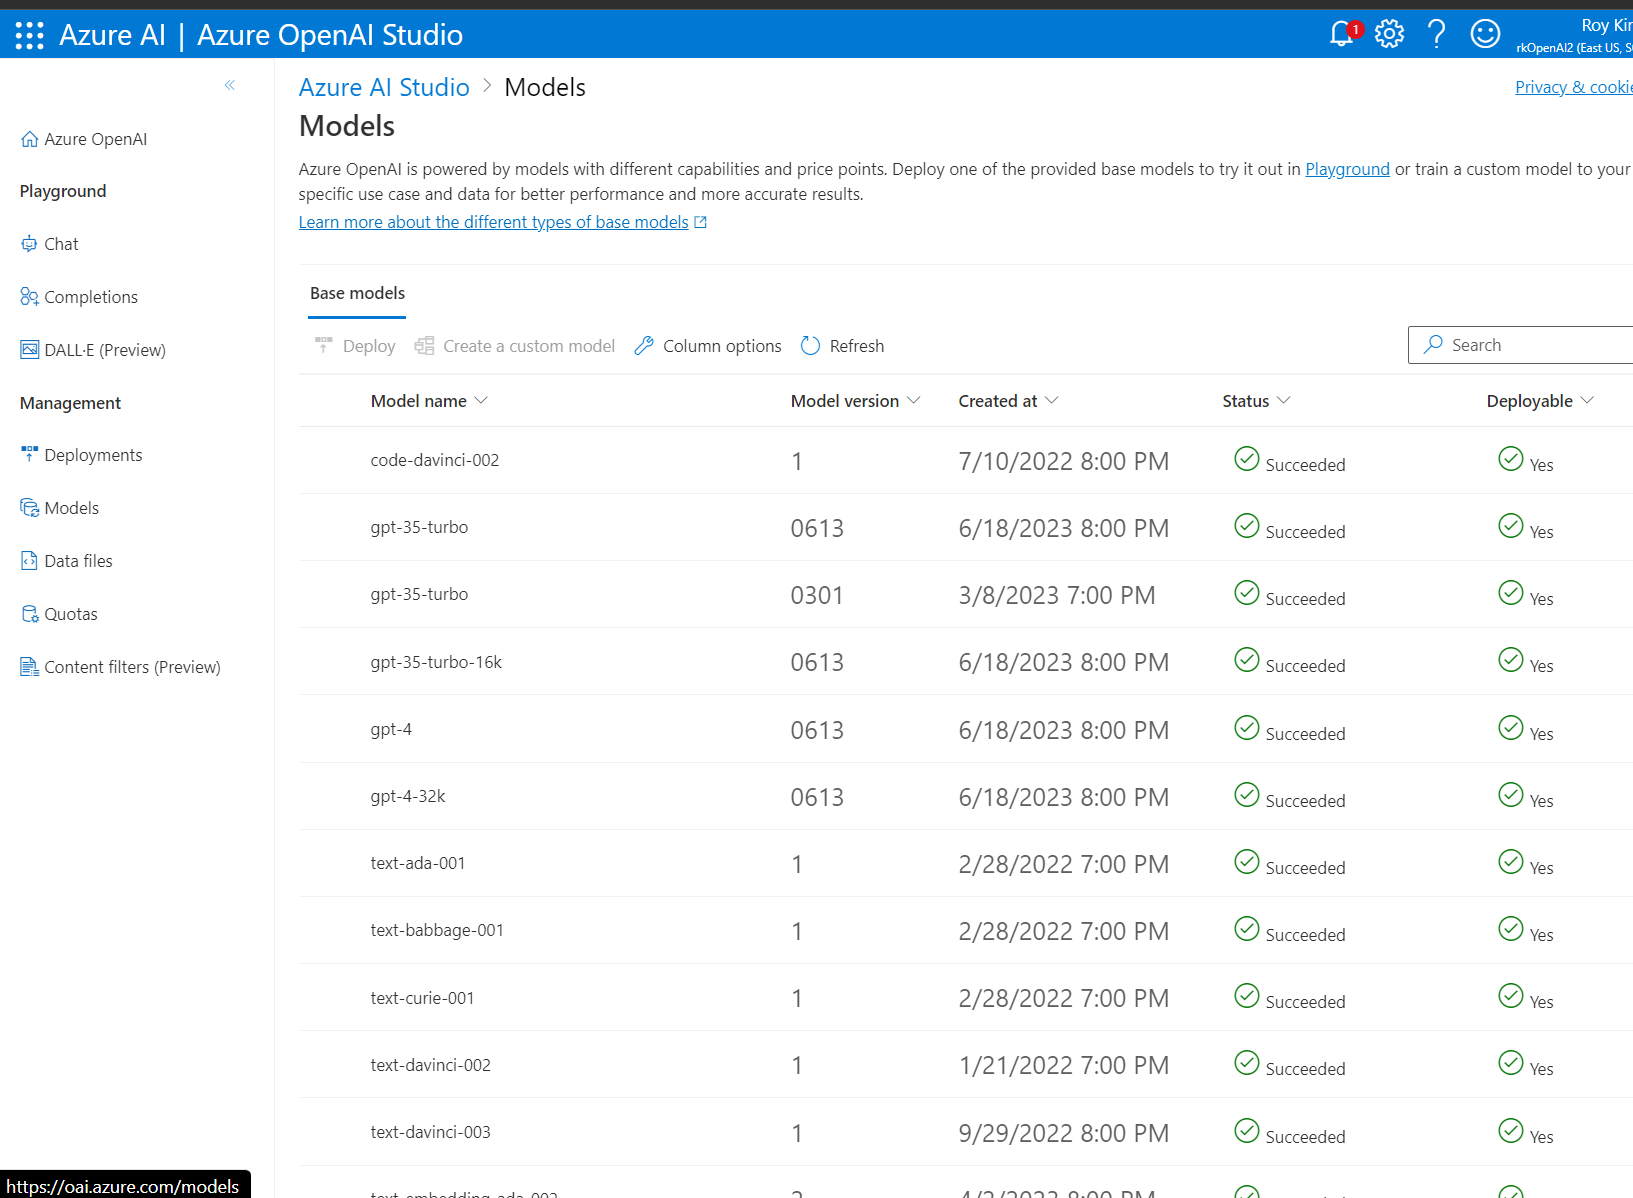
They differ by price, performance and capabilities. Capabilities can range from basic text classification to more powerful capabilities that you see in ChatGPT. The embeddings model is to vectorize text into a numerical format so that similarity in semantics can be compared between text. Semantic search is popular use case with embeddings model. Also the number of tokens a model can process and generate depends on each model. So choose your model to deploy based on the considerations. It takes a lot of experimentation and depends on the type of text and content you want to work with.
To use a model deployment, we have two options in the Playground which is Chat and Completions.
Completions the process of generating text based on a prompt. This is not chat style.

A suitable use case for Completions is when you write an app to loop through database records or a csv of tweets and you want to classify that the text about. Or apply sentiment analysis of positive, neutral and negative.
Chat is what many are familiar with in ChatGPT. The allows for dialogue where subsequent prompts answered based on the context of previous prompts. In the following the past 10 messages are remembered.

Note that I included a System message. I find this is an important prompt engineering technique to set the context and how the chat should response. The system message is part of every API call. In addition, having a system increases accuracy and decrease hallucinations of random text.
To use the API, let’s look at two approaches of REST call with Postman and Python with VS Code.
REST and Postman
The upper pane includes a Post request with the URL, http body for the json text of the prompt, Authorization header to include the OpenAI api-key.
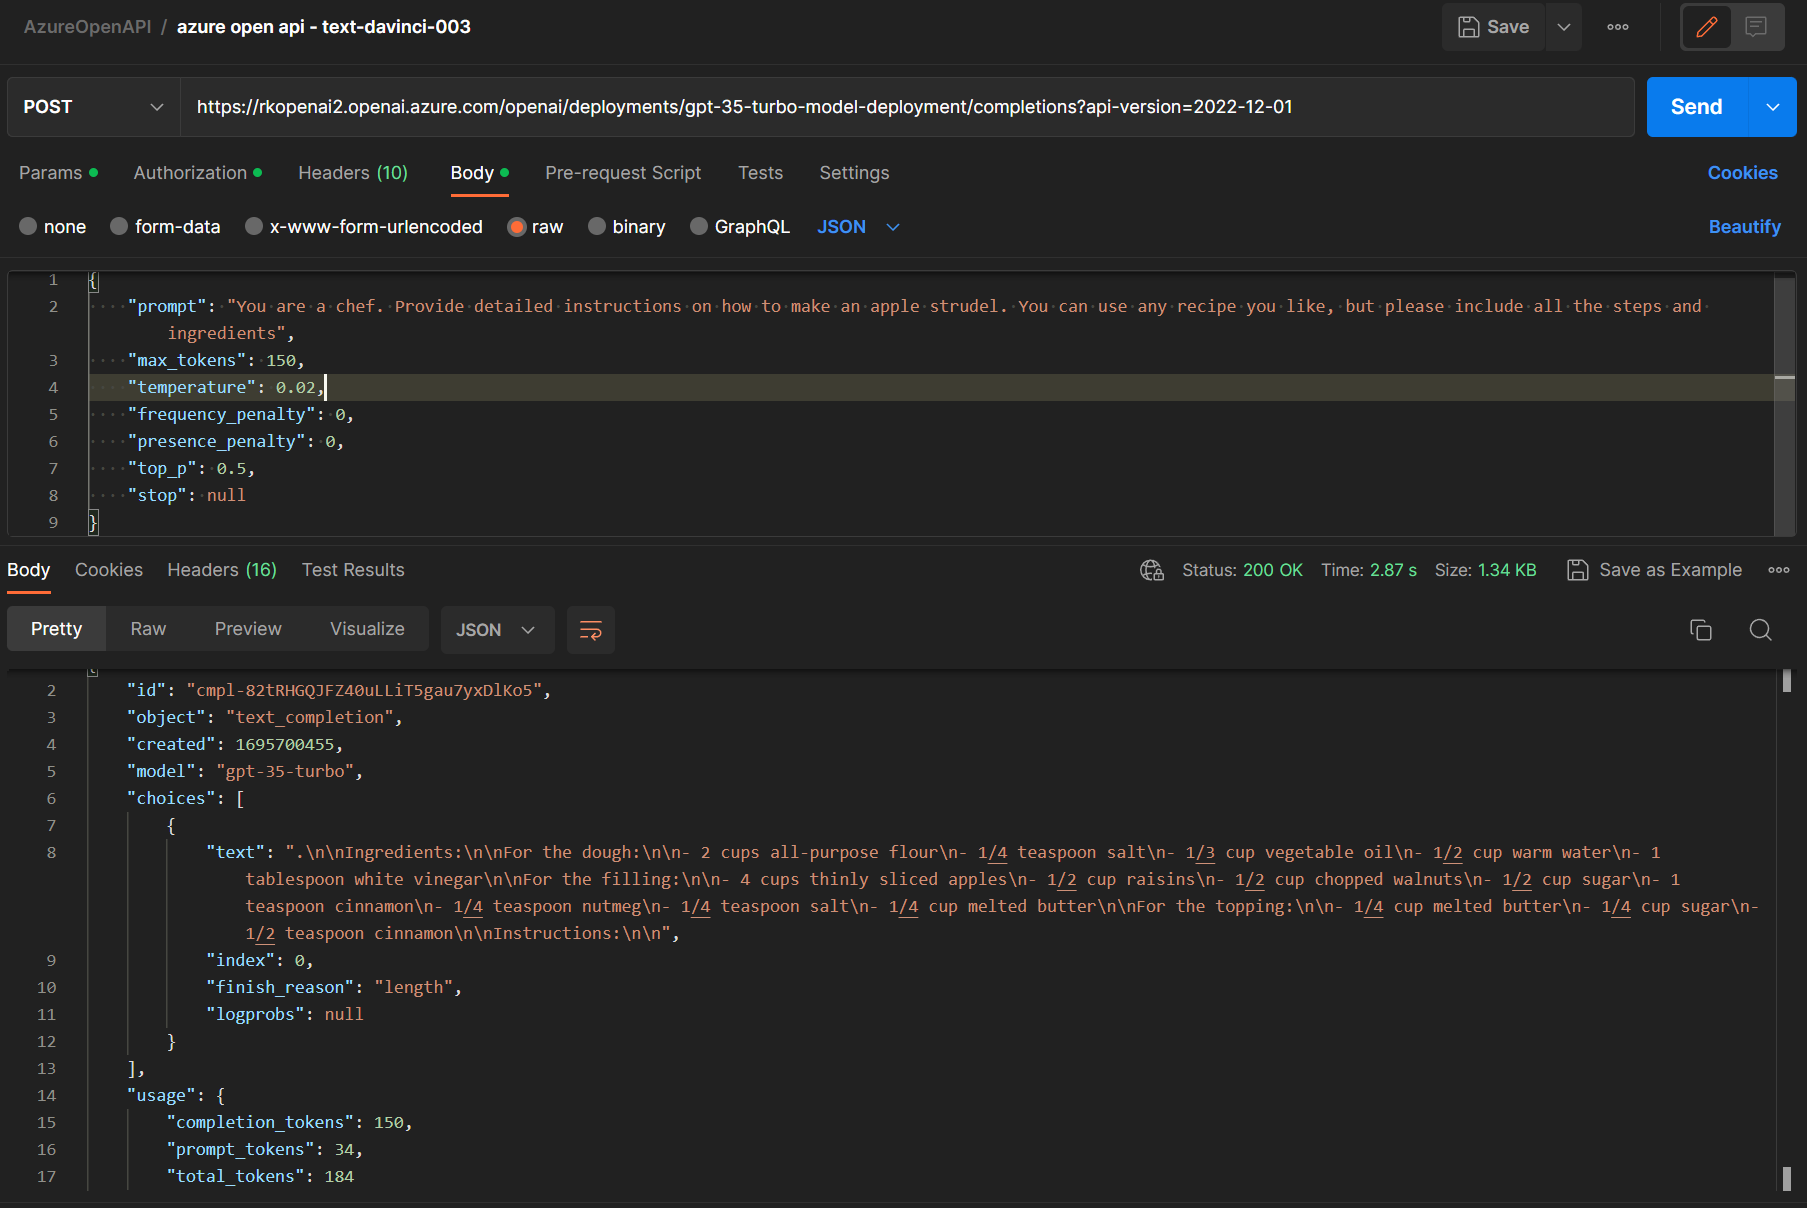
The bottom pane is the API call response with the completion text showing the recipe. Note that we have details to the completion_token and prompt token which helps determine pricing for that call. Too lookup pricing go to https://azure.microsoft.com/en-ca/pricing/details/cognitive-services/openai-service/
In this API call, it is priced as follows
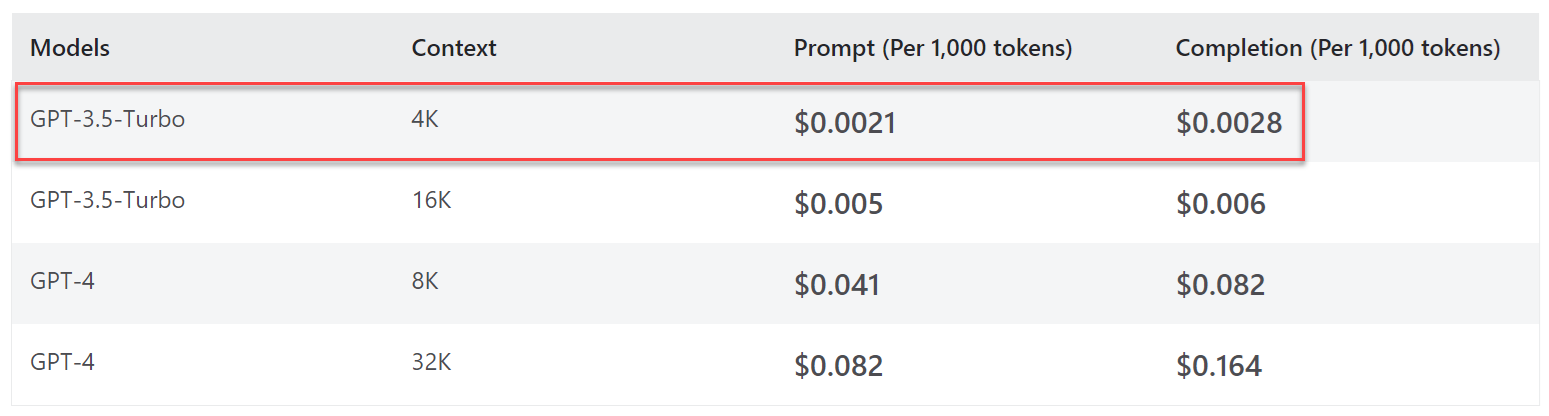
The calculation is $0.0021 x 34 prompt tokens/1000 + $0.000028 * 150 completion tokens/1000 = $0.0000714 + $0.0000042 = $0.0000756. If you had to generate 1000 requests from users for recipe prompts, then that would be $0.0756.
To show in Python and VS Code,

The response body returns json along with a text property with the text completion.
That concludes my quick start guide end to end. Check for any further deep dive posts as I venture more with Azure Open AI.
